Users & roles
This is where you give your colleagues access to your organisation and decide what each of them can do. You’ll find it in the account menu at the bottom of the sidebar.
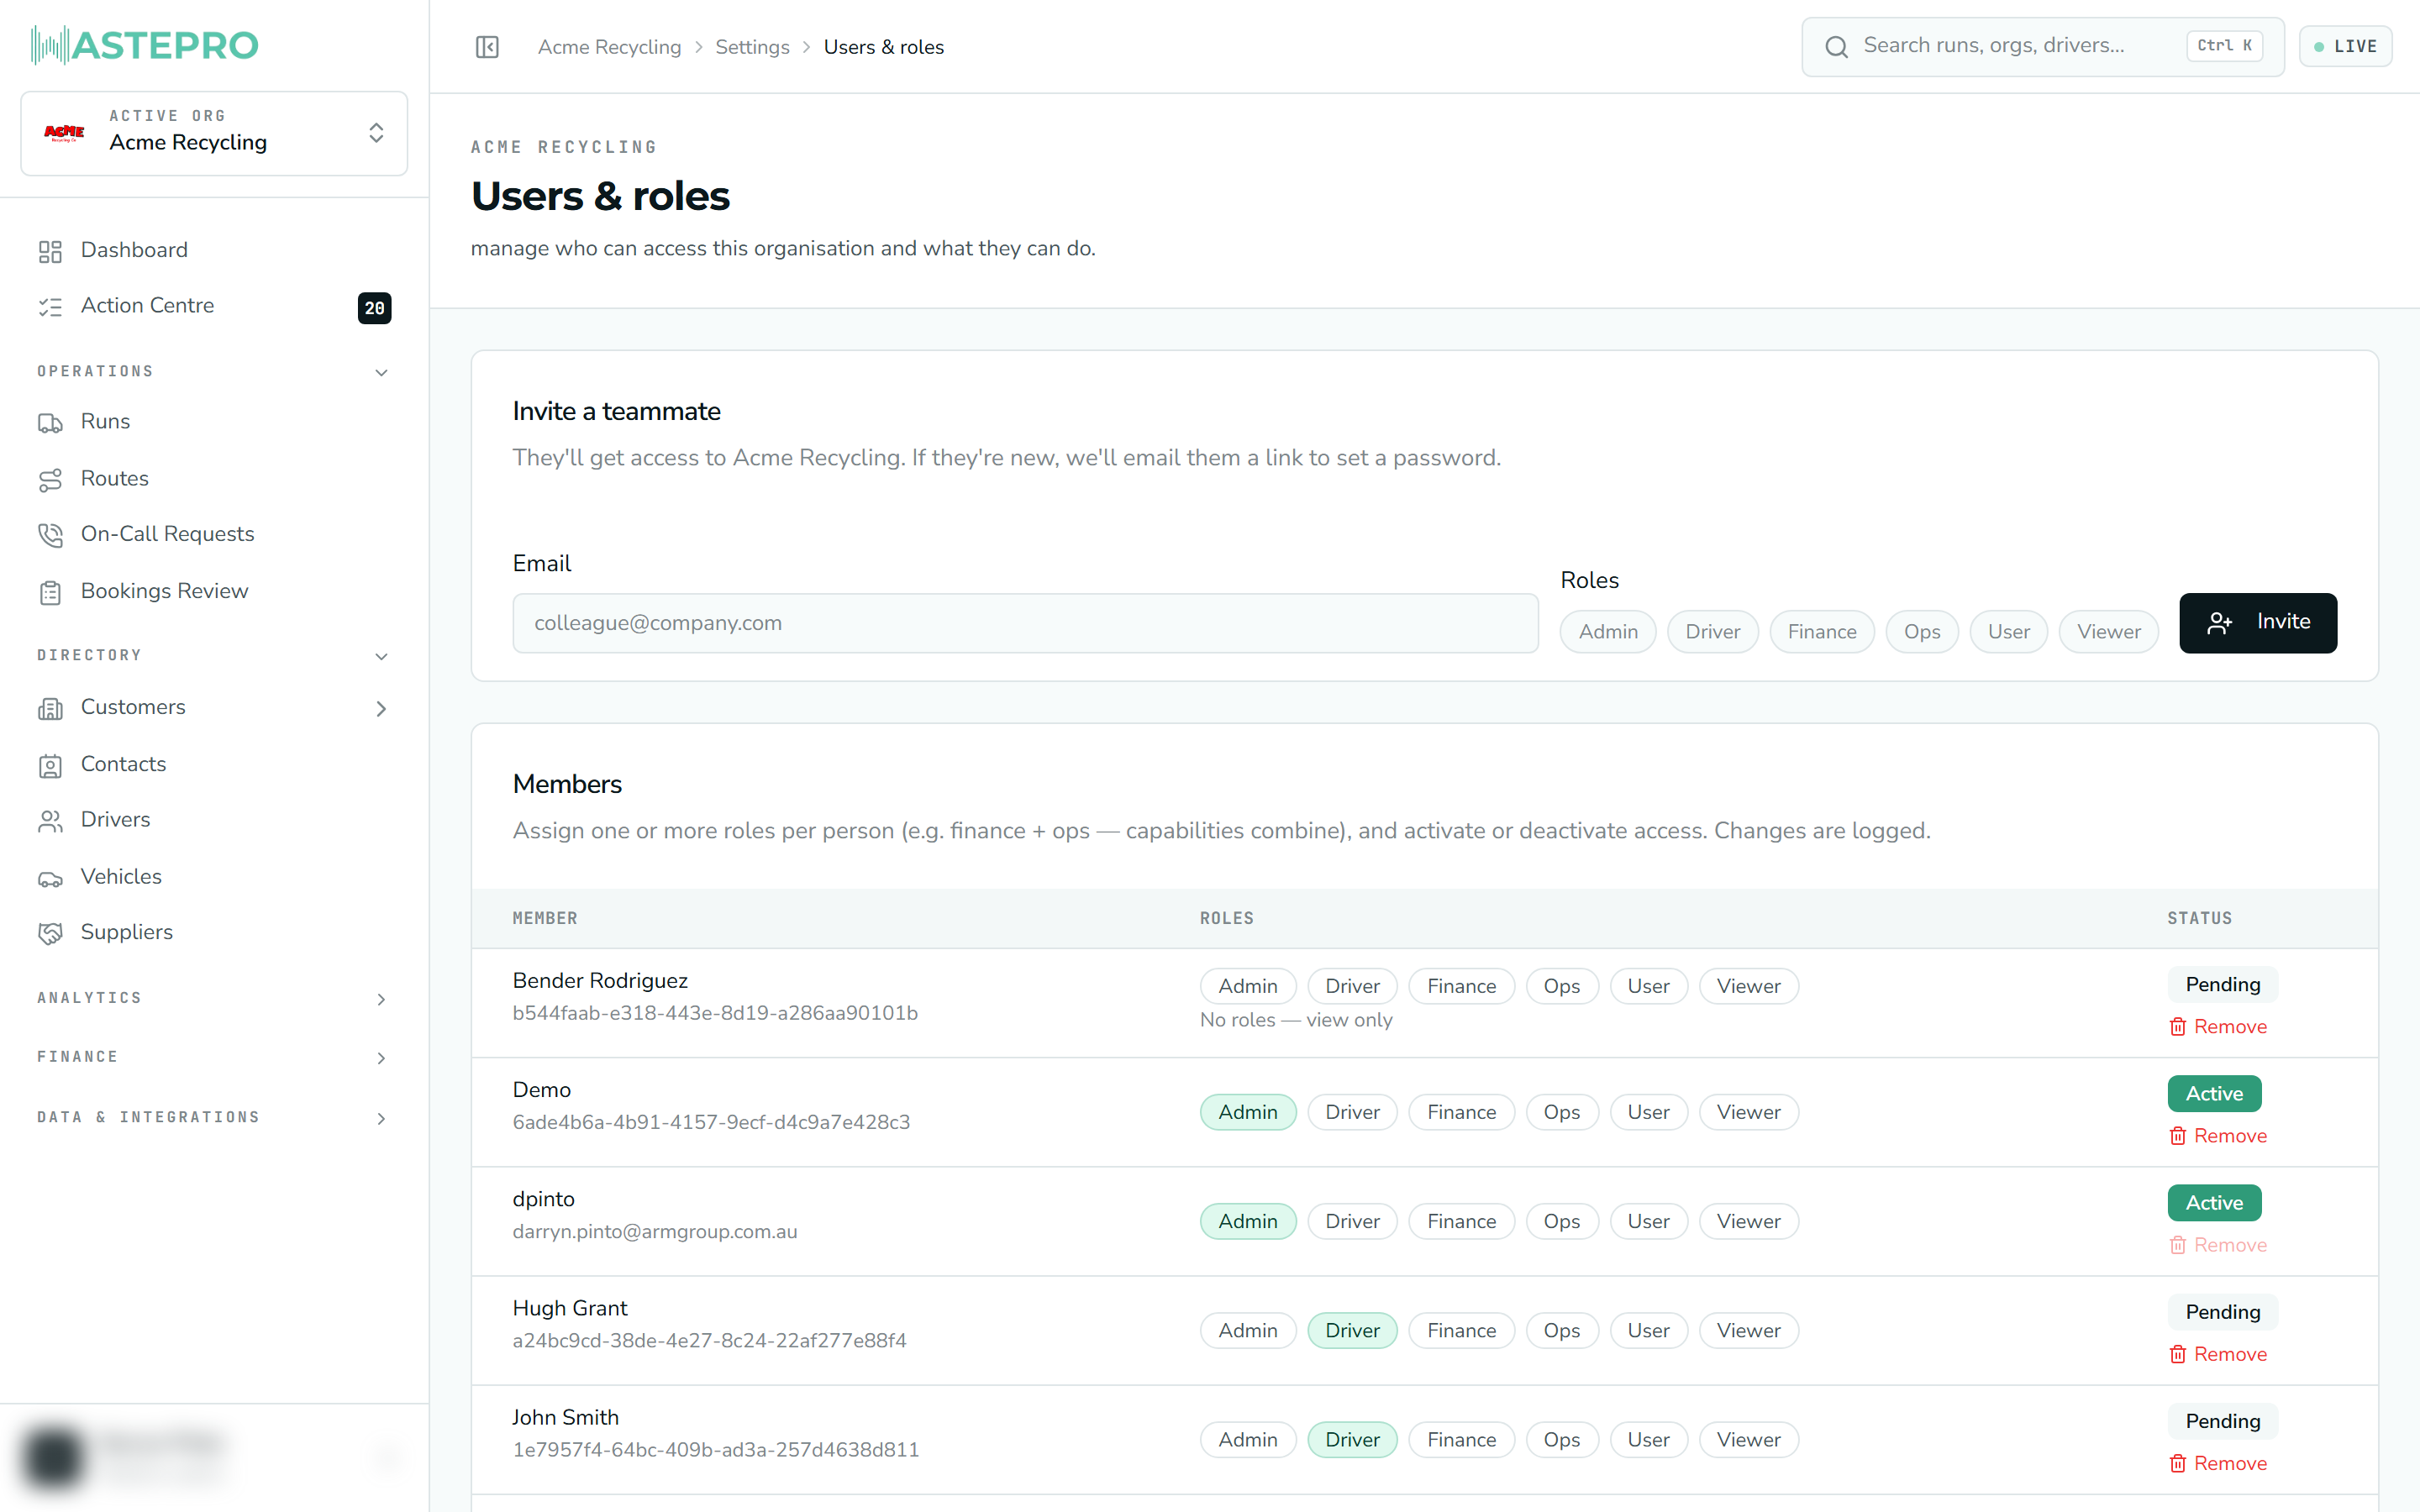
This screen is for organisation admins. If you can’t see it, your role doesn’t include managing users — someone with admin access will need to set that up for you.
What the screen shows
The page is scoped to your active organisation and has three parts, top to bottom:
- Invite a teammate — add someone new by email.
- Members — everyone who currently has access, with their roles and status.
- Change history — a running record of access and role changes.
Inviting someone
Enter their email
Type the person’s work email address in the Invite a teammate box.
Choose their role(s)
Click the role chips to pick one or more. Roles combine — if you give someone both finance and ops, they get the abilities of both. You can also invite with no role and add one later.
Send the invite
Click Invite. If they’ve never used WastePro before, they’re emailed a link to set a password. If they already have an account, they’re added straight away and can sign in to your organisation immediately.
The roles and what they can do
A role is a bundle of permissions. Here’s what each one allows. Remember that a person can hold several roles at once, in which case their abilities add up.
| Role | View data | Change rates | Edit day-to-day records | Delete records | Manage users | Manage connections |
|---|---|---|---|---|---|---|
| admin | ✓ | ✓ | ✓ | ✓ | ✓ | ✓ |
| owner | ✓ | ✓ | ✓ | ✓ | ✓ | ✓ |
| finance | ✓ | ✓ | ||||
| ops | ✓ | ✓ | ||||
| user | ✓ | ✓ | ||||
| viewer | ✓ | |||||
| driver | ✓ |
A few things worth pulling out of that table:
- Changing rates is its own permission. Only admin, owner and finance have it. Someone with ops can edit a booking, a run or a service’s schedule but will see pricing read-only. That’s deliberate — see Rates & pricing.
- Deleting is not the same as editing. Only admin and owner can delete records such as a run. Ops and user can create and edit, but not remove.
- Managing users doesn’t imply anything else. It’s a separate permission from deleting data.
A member with no role can still sign in, but they see data only — they can’t change anything until you give them a role.
Roles are per organisation. Someone can be an admin in one of your businesses and a viewer in another; what they can do follows the organisation they’re currently in.
Managing existing members
Each person in the Members list has:
- Roles — click a chip to switch a role on or off. Changes take effect straight away.
- Status — a badge showing Active or Pending. Click it to flip between the two. Setting someone to Pending suspends their access without removing them, which is handy for someone who’s temporarily away.
- Remove — takes the person out of the organisation entirely.
Remove is not the same as setting someone to Pending. Removing takes their access away completely, and to bring them back you’d have to invite them again. If you only want to pause access, use the Pending status instead. You can’t remove yourself.
Keeping track of changes
Every role change, status change and removal is recorded automatically in the Change history at the bottom of the page, showing who made each change and when. Click a column heading to sort. The same information also lives on the fuller Logs & Trash screen.
Next: see Logs & Trash for the full audit trail, the operational event log, and how to restore deleted records.