Xero Invoice Export
This is how a month’s work becomes customer invoices. WastePro prepares the billable jobs as a file in Xero’s own import format; you review it here, download it, and import it into Xero.
You’ll find it under Data & Integrations › Export Data, next to its opposite number, Xero Bill Export.
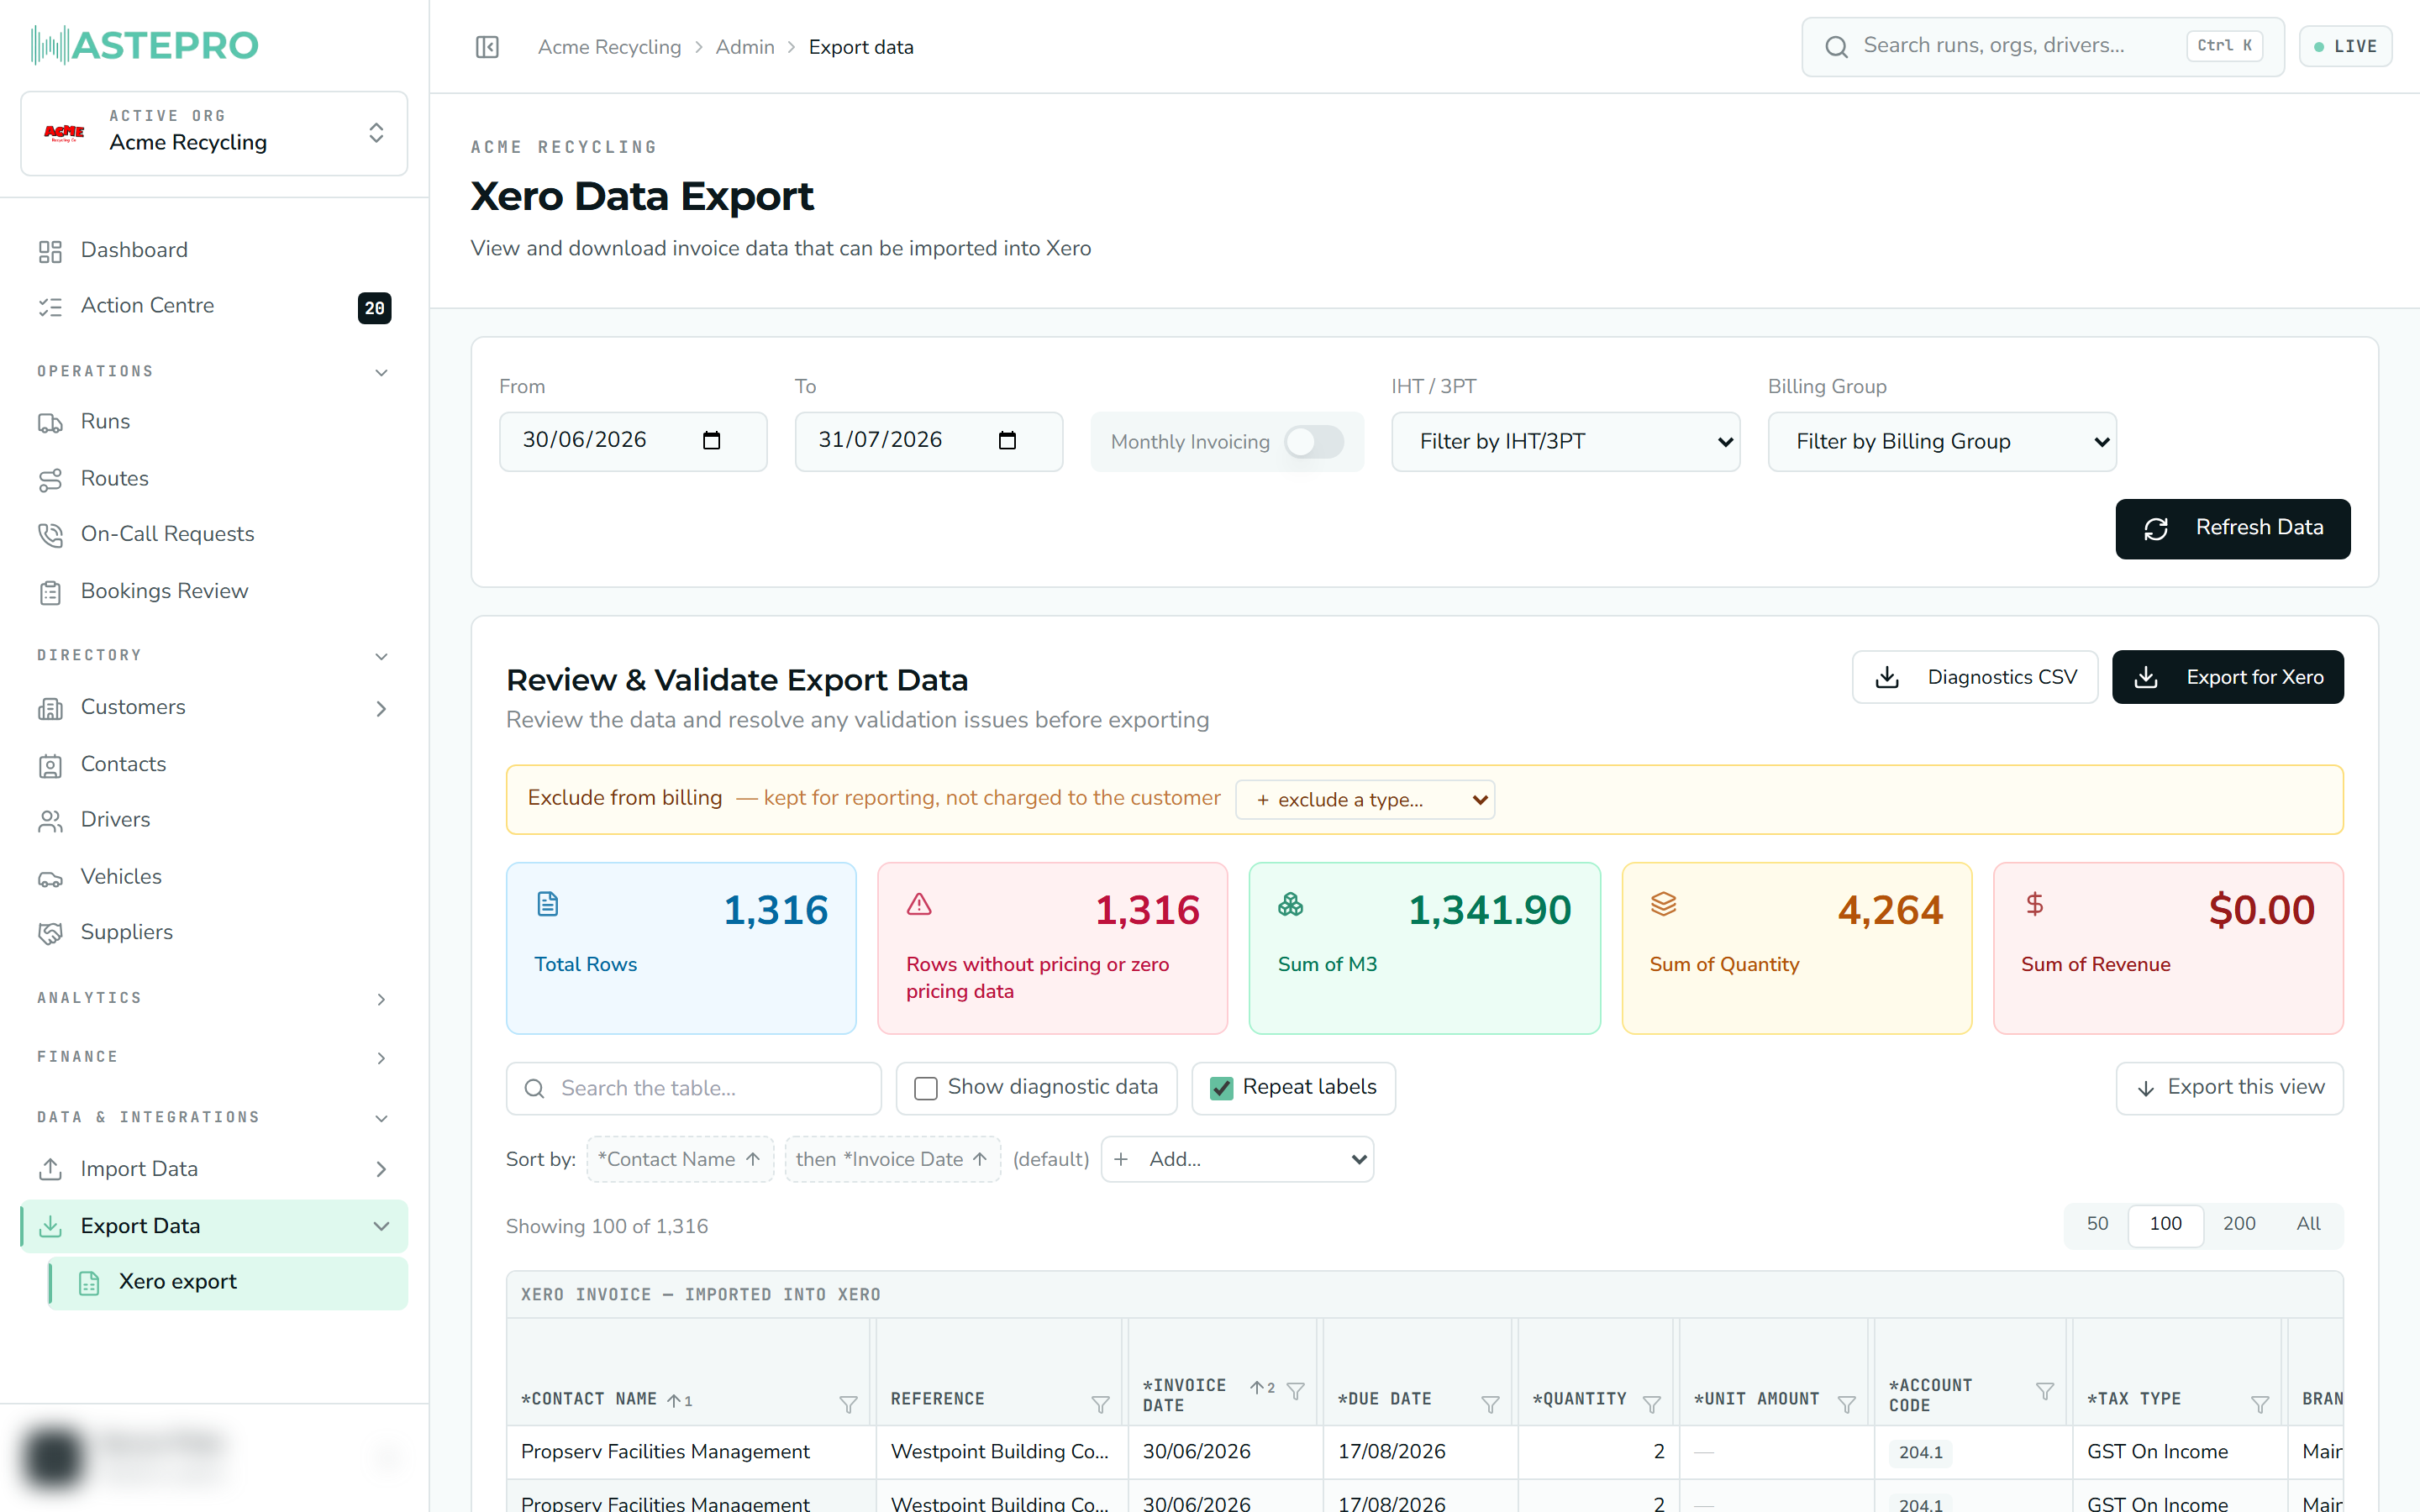
This is a back-office screen, generally available only to managers and admins. It’s read-only — it builds a file for you to import into Xero; it doesn’t create invoices in Xero directly.
Choosing what to export
A toolbar across the top decides which jobs are included. Set your filters, then press Refresh Data to load them — nothing changes until you do.
| Control | What it does |
|---|---|
| From / To | The date range of work to bill. Opens on the last complete calendar month. |
| Quick range | This month and Last month buttons, so the usual window is one click. |
| IHT / 3PT | Limit to your own in-house work, subcontracted work, or both. |
| Billing Group | Narrow to a single billing group, where your account uses them. |
Invoicing is monthly. There used to be a weekly/monthly toggle; it’s been retired, and bin rentals now come through the same pipeline as everything else rather than being appended separately.
Reading the summary
Above the grid, a row of cards totals what’s currently shown:
- Total Rows — how many invoice lines are in the export.
- Rows without pricing or zero pricing data — lines with no price, or a zero price. These are the ones to chase before you bill, so nothing goes out at $0.
- Sum of M3, Sum of Quantity, Sum of Revenue — the volume, quantity and dollar totals, for a quick sanity check against last month.
Treat Rows without pricing as a stop, not a statistic. A line with no price is work you did and won’t be paid for. Clear the No pricing lane in the Action Centre and refresh before you download.
The export is capped at 10,000 rows. If you hit the cap, narrow the date range and export in smaller pieces so nothing is silently left out.
The preview grid
The grid shows exactly the columns that end up in the file, so what you review on screen is what Xero receives. It behaves like a spreadsheet — you can sort, filter, resize and pin columns. The main columns are the ones Xero needs to build an invoice:
| Column | Meaning |
|---|---|
| Contact Name | The customer the invoice is billed to. |
| Invoice Number / Reference | How the invoice is identified. |
| Invoice Date / Due Date | Issued and due dates, formatted the way Xero expects. |
| Quantity / Unit Amount | How many, and the price each (ex-GST). |
| Account Code / Tax Type | The accounting code and GST treatment. |
| Description | The line description that appears on the invoice. |
Show diagnostic data
A Show diagnostic data toggle reveals a second band of columns — site, customer, waste stream, volume, cost, subcontractor, job type code and various IDs. These are there so you can check the numbers before you export (for example, comparing revenue against cost). They are not sent to Xero — they’re for your eyes only.
Excluding job types from billing
Some job types are captured for your own reporting but shouldn’t be charged. The Exclude from billing row lets you toggle those out of the export. Excluded lines are held back from the file — you’ll see how many rows and dollars are being held back — and Save as default makes the same exclusions apply automatically next time.
This is an organisation-wide rule. To stop billing one particular customer or site for a charge type while everyone else still gets it, use the What we invoice switches on that customer or site instead — see Billing rules.
Downloading
Two download buttons sit above the grid:
- Export for Xero — the file in Xero’s own invoice-import format. It imports straight into Xero (Business → Invoices → Import) with no copying into a template.
- Diagnostics CSV — the full dump, including the diagnostic columns, for your own records and checking.
Next: Xero Bill Export is the other half of the month — the supplier bills you have to pay.