Finding your way around
Every screen in WastePro shares the same frame: a menu down the left, a thin bar across the top, and your current screen filling the rest. Once you know those two pieces, you can find anything.
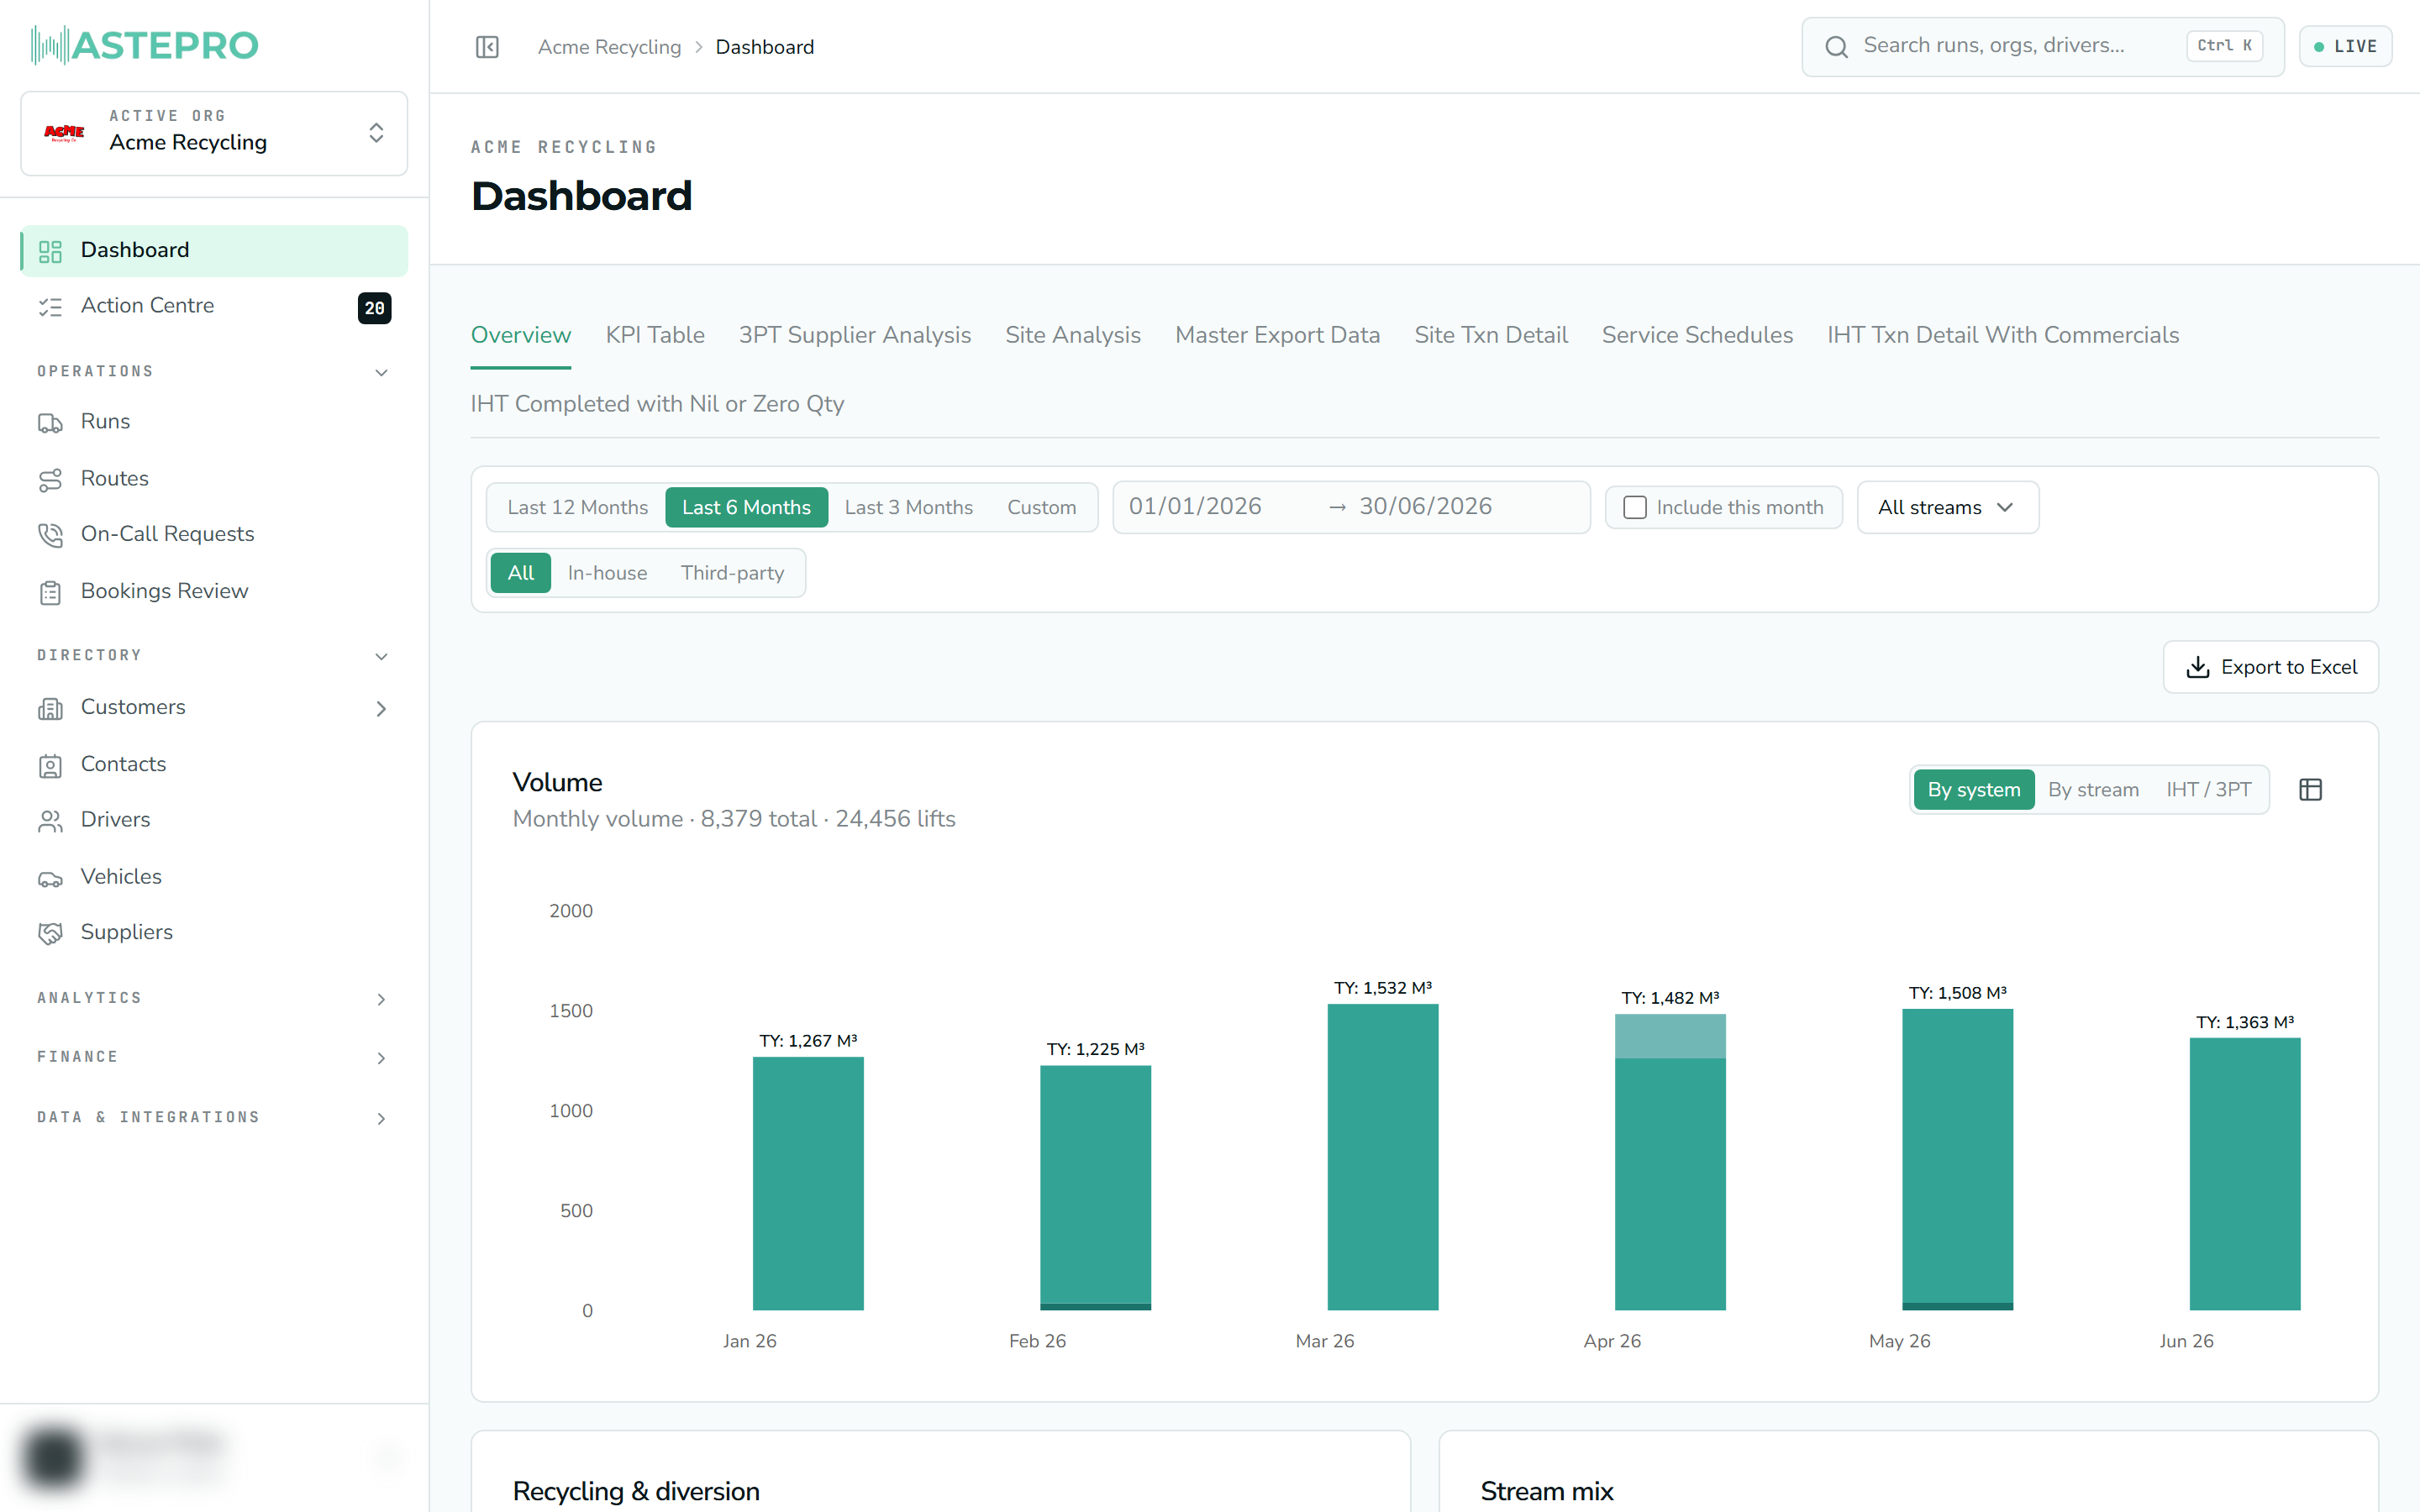
The left-hand menu (the sidebar)
The sidebar is your main way of moving around. From top to bottom it has three parts:
- Your organisation — at the very top, a card showing which business you’re currently working in. If your login covers more than one business, this is also where you switch between them. See Switching organisations.
- The menu itself — the list of screens, grouped into sections.
- Your account — pinned at the bottom. Your initials and name appear here; opening it reveals the settings screens you have access to, and the Sign out button.
What’s in the menu
Here’s the whole thing, in order, with what each item is for. Sections marked starts closed are collapsed when you first arrive — click the heading to open them.
At the top (no heading)
| Item | What it’s for |
|---|---|
| Dashboard | Your home screen — volumes, recycling, who’s doing the work. |
| Get set up | The new-business checklist. Only shown while it’s switched on for your account. |
| Action Centre | Data problems waiting to be fixed. Carries a live count. |
Operations
| Item | What it’s for |
|---|---|
| Runs | Each day’s trip — schedule, allocate, check how it went. |
| Routes | Reusable templates of stops that generate those runs. |
| On-Call Requests | One-off pickups a customer has asked for. |
| Bookings Review | The month’s jobs on one grid, checked before invoicing. |
Directory
| Item | What it’s for |
|---|---|
| Customers | Who you bill. Opens a group containing the rest of the record screens. |
| ↳ Sites | The places you collect from. |
| ↳ Services | Every recurring collection, as a flat list. |
| ↳ Master List | Every service on one editable grid. |
| ↳ Uprate Worksheet | Model and apply price increases. |
| ↳ Customer Dashboard | Build an embeddable reporting view for a customer. |
| ↳ Customer Portal | Build a customer’s own login area. |
| Contacts | The people you deal with. |
| Drivers | Your own operators. |
| Vehicles | Your fleet. |
| Suppliers | The subcontractors who collect on your behalf. |
Analytics — starts closed
| Item | What it’s for |
|---|---|
| Explore | Build a chart from scratch. Only shown when switched on for your account. |
| Self-Service Report Builder | Build a report from scratch, column by column. |
| Brokerage (3PT) | ↳ Subcontract/Brokerage Analysis, ↳ Supplier Analysis |
| Transport (IHT) | ↳ IHT Analysis By Customer, ↳ Driver Productivity Analysis |
| Customer Analysis | ↳ Site / Customer Metrics |
| KPIs | ↳ Volume Trend, ↳ Driver / Subcontractor Metrics, ↳ Job Metrics by Month |
| Reviews | ↳ Futile Jobs, ↳ Contamination |
Finance — starts closed
| Item | What it’s for |
|---|---|
| Invoicing | Building invoices inside WastePro. Still in development, so it’s off the menu by default. |
| Receivables | What customers owe, read live from Xero. Only for organisations whose Xero connection shares invoice data. |
Data & Integrations — starts closed
| Item | What it’s for |
|---|---|
| Import Data | ↳ Import 3PT Data — load your subcontractors’ invoices. |
| Export Data | ↳ Xero Invoice Export (what customers owe you), ↳ Xero Bill Export (what you owe suppliers). |
The account menu, at the bottom
These are the governance and configuration screens. They’re kept out of the main menu so the day-to-day list stays short. Most need the manage users permission.
Users & roles · Assumption Base · Connections · Audit log · Event log · Trash · Organisations · Platform Admin (WastePro staff only)
You won’t see all of this. The menu adapts three ways: some items need a particular permission, some are hidden for broker organisations that have no in-house fleet (Runs, Routes, Drivers, Vehicles), and a few are switched off until the feature is finished. A missing item is nearly always one of those three, not a fault.
Sections expand and collapse
Select a heading to open or close that group — it works like a set of drawers, so you can keep the ones you use open and the rest tucked away. WastePro remembers which groups you left open. The group containing the screen you’re currently on always stays open so you never lose your place.
Analytics, Finance and Data & Integrations start closed, because most people don’t need them daily.
Giving a screen more room
You can collapse the whole sidebar to a narrow strip of icons using the toggle button in the top bar — handy when you want more width for a screen. Hover over the strip and it slides back out temporarily. A couple of the wide spreadsheet-style screens (Bookings Review and Master List) collapse it automatically to make room for the grid; you can always slide it back out.
The top bar
The slim bar across the top of every screen holds:
- Breadcrumbs — a trail on the left (for example Customers › Acme Pty Ltd) showing where you are and letting you step back up.
- Search — a search box on the right (covered below).
- A green “Live” pill — simply confirms the app is connected and working.
Search: the fastest way to jump anywhere
The search box in the top-right is the quickest way to get to a specific record. Start typing and matching results appear grouped by type — customers, sites, services, contacts, drivers, vehicles, routes, runs and bookings — so you can jump straight to one.
Search is forgiving of near-misses, so a slightly wrong spelling usually still finds the record.
You can open search from anywhere with a keyboard shortcut: Ctrl + K (or ⌘ + K on a Mac). Type at least two letters to see results.
Your account menu
At the bottom of the sidebar, your account menu shows your initials, your name, and your role (such as Administrator or Member). Open it to reach any settings you have access to and to Sign out when you’re done.
Next: Switching organisations — if your login covers more than one business. If a menu label doesn’t mean anything to you yet, The words WastePro uses will explain it.